So I won't deny it, I have been all over the map these past few weeks BUT...I have some very exciting news to share next week because of it. Sometimes it is just so hard to keep a secret!
While I am holding off until Monday for the big reveal I thought I would share with you a fun end of summer (tear...) recipe that will be sure to satisfy your taste buds this weekend. Ever since I first tried these at my friends house a few summers ago this has become my favorite go-to recipe. Southern Living can do no wrong! Enjoy!
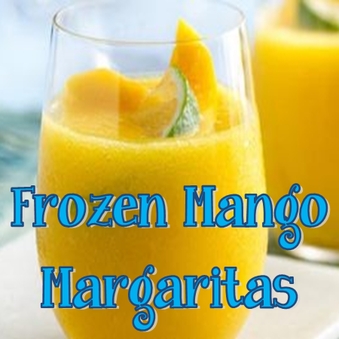
Frozen Mango Margaritas(Makes about 10 cups) Ingredients- 1 - 20oz jar refrigerated sliced mangoes
- 1 - 6oz can frozen limeade concentrate, thawed
- 1 cup tequila
- 1/2 cup orange liqueur
- colored decorator sugar (optional)
Instructions- For an extra bit of sparkle to your glass spoon 3 Tbsp. juice from mangoes into a shallow dish, dip rims of glasses into the juice and then dip them into the sugar crystals to coat.
- Take the rest of the juice and the mangoes and pour them into your blender with the limeade concentrate, tequila and orange liqueur. Blend all the ingredients until smooth making sure to stop and scrape down the sides periodically.
- Once fully blended pour half of the mixture into a separate glass and put to the side.
- Add ice to the remaining mango mixture in the blender and blend until slushy. Again, you might need to stop and scrape down the sides to get it fully blended.
- Pour your mango margs into your dazzling glasses and then repeat the ice adding process with the remaining mango mixture so you have your second batch ready to go! (And believe me you will want that second batch ready to go ASAP!)
**Additional fruit or garnishes optional but thoroughly enjoyed if provided!
I hope everyone has a wonderful weekend and be on the look out as I might share a hint or two this weekend about my fun announcement on Monday! :) xoxo Megan You might also like these summertime favorites...
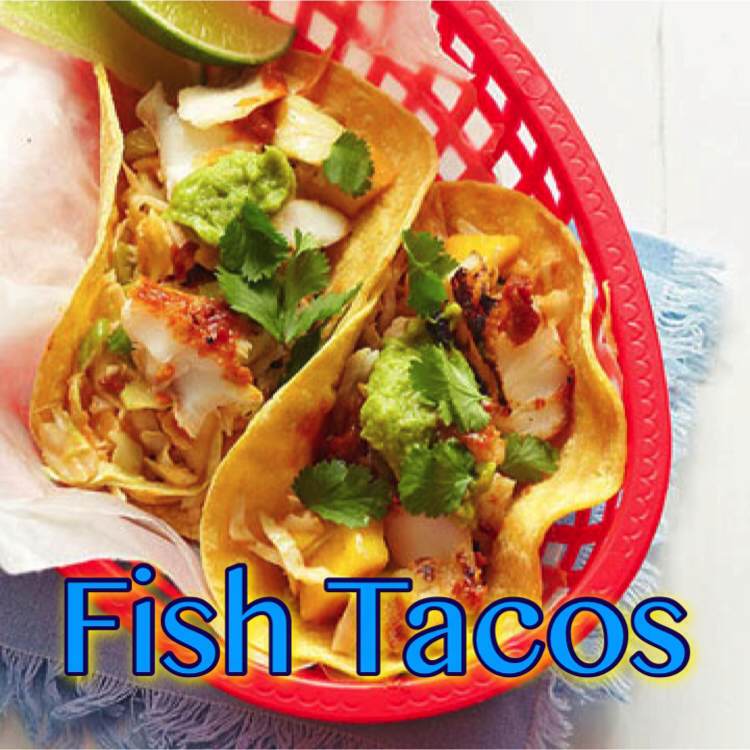
This past week I have been getting some rest, relaxation and tons of sun down at the beach. One thing I always look forward to while I am at the beach is the easy access we have to enjoy some amazing seafood. You might call me a seafood snob, but with my aunt and uncle living at the river I was raised enjoying freshly caught (as in it was swimming without a care in the world less than 24 hours ago) seafood so anything less than that is just not acceptable. One of my favorite recipes that I always have a few times while I am at the beach are fish tacos. I love the different salsas, slaws and dressings that restaurants pair with their fish and have fallen in love with all of them. Since I will be heading home tomorrow I decided to hunt down my own delicious fish taco recipe so that I can enjoy them year round. Here is one that I cannot wait to try that I found from Midwest Living. Ingredients- 1 fresh mango, seeded, peeled and diced
- 1/2 cup barbecue sauce
- 1/4 cup light mayonnaise
- 1 teaspoon lime zest
- 3 cups coleslaw mix (shredded cabbage with carrot)
- 4 green onions, thinly sliced
- 12 ounces fresh white fish (tilapia, cod or mahi are popular choices)
- 8 6-inch tortillas
- 1/2 cup sliced guacamole
- 1/2 cup chopped fresh cilantro
Directions- Place half the diced mango in a blender or food processor. Add barbecue sauce; puree until smooth.
- In a large bowl combine 2/3 cup of the barbecue sauce mixture, the light mayonnaise and lime zest. (Reserve the remaining 1/3 cup of the barbecue sauce mixture.) Add remaining diced mango, your shredded coleslaw mix and green onions. Toss to coat. Cover and chill until ready to serve.
- Grill fish on the greased rack of a covered charcoal or gas grill directly over medium heat for 4 to 6 minutes per 1/2-inch thickness or until fish flakes when tested with a fork, brushing generously with the reserved 1/3 cup barbecue sauce mixture during the last 2 minutes of grilling. Wrap tortillas in foil and place on grill rack over heat while fish is grilling to warm, turning once halfway through warming.
- To serve, fill warm tortillas with coarsely flaked fish, coleslaw, guacamole and cilantro. If you like, squeeze with lime juice.
This recipe is pretty close to my favorite BBQ Fish Tacos, which were featured on Food Network's DDD, that you can find at a place called Flip Flops down in Virginia Beach. I can't wait to try this recipe out once I get home! W hat is your favorite thing you like to eat when you go to the beach?xoxo Megan You might also like...
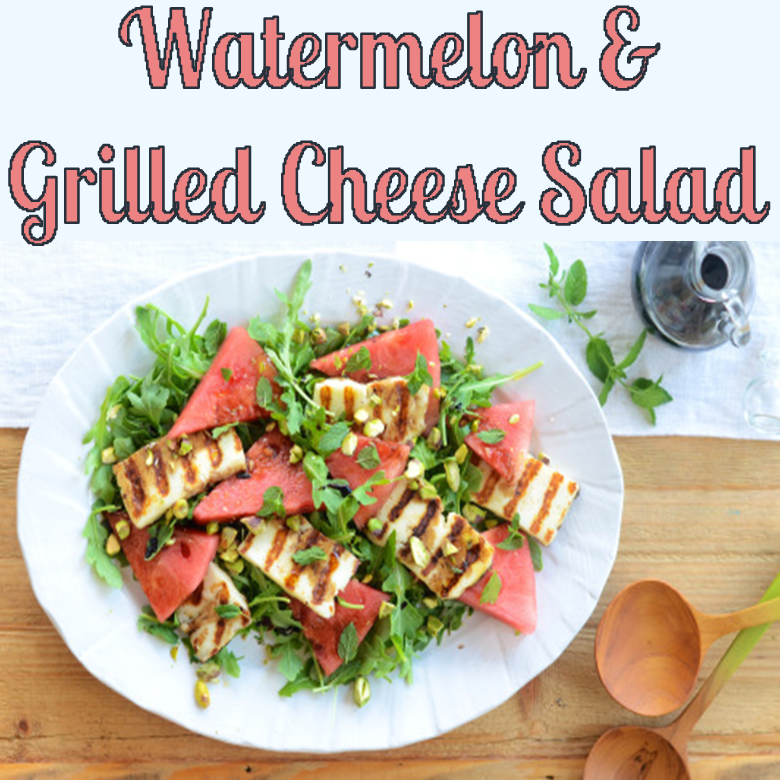
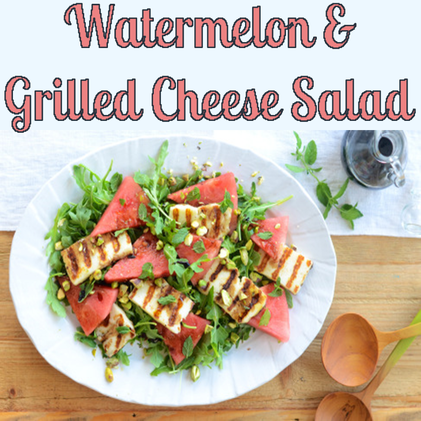
One food that I always look forward to enjoying in the summer is watermelon. It is great for picnics, fun to grill, a perfect snack for the pool, easy to turn into a delicious drink and a great summer salad ingredient! With gardens and farmer's markets just over flowing with delicious foods during the summer months there are no limitations to what you can create a delicious summertime salad out of. I always make sure to take full advantage of all the delicious goodies I can get my hands on! When I ran across this recipe in Relish that included watermelon on a salad I could not wait to give it a try. I hope you enjoy it as much as I did! Watermelon & Grilled Cheese Salad Ingredients - 6 ounces of haloumi or fresh mozzarella cheese, drained
- 3 cups arugula or other salad greens
- 1/4 seedless watermelon, cut into small pieces
- 3 tablespoons EVOO
- aged balsalmic vinegar
- 1 bunch fresh mint, chopped
- 1/4 cup pistachios, rouchly chopped
Directions - Start by slicing your cheese into 1/3 inch slices.
- Next heat your grill or grill pan to medium-high and lightly cover the brush grate with olive oil to prevent the cheese from sticking.
- You want to grill your cheese about 2 minutes on each side or until the cheese has some nicely defined grill marks (presentation is everything with the cheese! lol).
- Place your salad greens in your serving dish and then top with your cut watermelon and cheese.
- Drizzle the salad with your olive oil and vinegar followed by your chopped mint and pistachios.
*This recipe make approximately 4 servings This is a great salad to make for your next summer cookout you have as it pairs great with just about everything! What is your favorite way to enjoy watermelon during the summer? Have a wonderful weekend! xoxo Megan You might also like...
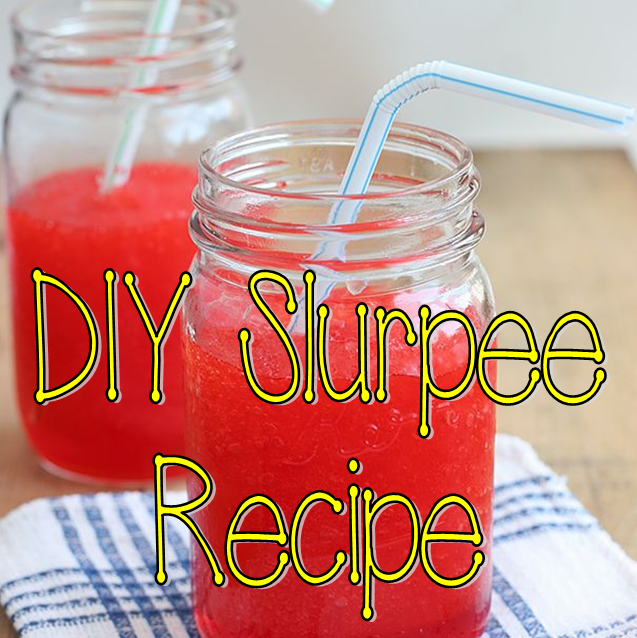
It's finally Friday! (And yes, I may have that classic Friday song stuck in my head - and I'm totally ok with that!) For me most Fridays during the summer mean its time to plan fun activities for the weekend, but this weekend you don't have to wait for 5 o'clock to get here to start having fun because...today is free slurpee day! If you want to have a little more fun you can also dress up as a cow and head over to Chick-fil-A for Cow Appreciation Day, but I'll leave that one up to you! Back to the slurpees. So if for some reason you have never heard of free slurpee day its hosted on by 7-Eleven on you guessed it 7-11 or July 11th (pure genius, right?). So in celebration of free slurpee day here is a great recipe I found on how you can turn your favorite drink into your very own slurpee. Enjoy! Ingredients- 4 cups of ice
- 2 cups of water
- 1/4 to 1/2 cup of sugar
- Your favorite drink
Directions- Pour 4 cups of ice into a blender.
- Pour the crushed ice into a container and place it in the freezer.
- Pour 2 cups of water and your sugar into the empty blender and blend thoroughly.
- Pour 1 can (your drink) into the blender and blend for approximately 10 seconds.
- Take the crushed ice out of the freezer, pour into the blender with your liquid mixture and blend for 15 seconds.
- Pour into a cup and enjoy!
You can make your own slurpee flavor creations by combining different drinks and flavors too. What is your favorite slurpee flavor? Have a wonderful weekend! xoxo Megan You might also like...
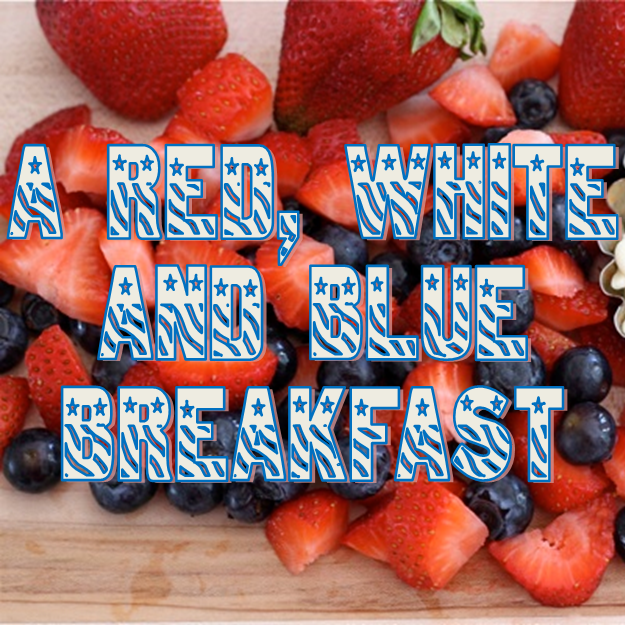
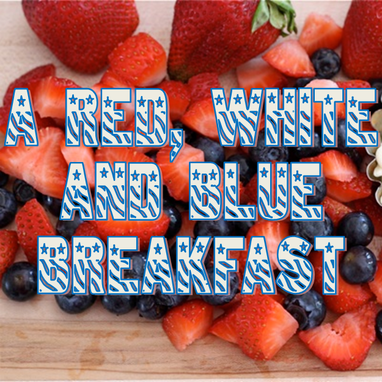
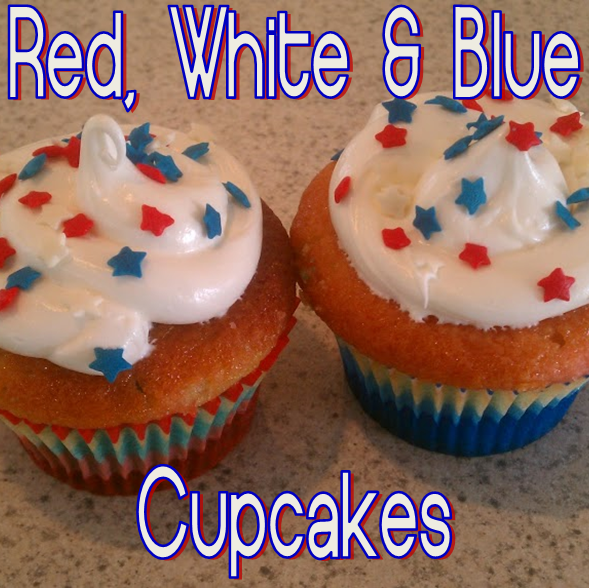
The 4th of July is just 1 week away so it's time to pull out those red, white and blue recipes and get ready to celebrate! Instead of waiting to start enjoying some festive red, white and blue treats this year I found two great red, white and blue breakfast treats that would be perfect to prepare for the holiday weekend. Red, White and Blue-berry Muffins from Sophistimom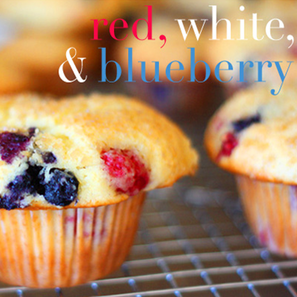 Ingredients- 3 cups all-purpose flour
- 2 teaspoons baking powder
- 1/2 teaspoon baking soda
- 1 teaspoon salt
- 1 stick unsalted butter, at room temperature
- 1 1/4 cups granulated sugar
- 2 eggs
- 2 teaspoons pure vanilla extract
- 1 1/4 cups drinkable yogurt (plain or vanilla) or buttermilk
- 1 cup fresh raspberries
- 1 cup fresh blueberries
- 3 tablespoons granulated sugar
Directions- Preheat oven to 375. Line 18 regular muffin tins with paper liners. Set aside. In a large bowl, whisk together flour, baking powder, baking soda, and salt.
- In a new bowl, cream together butter and sugar and beat on medium high until light and fluffy, about 2 minutes. Lower the speed to medium low and add eggs, one at a time, mixing well after each addition followed by the vanilla.
- With the mixer on the lowest setting, alternate mixing in the flour mixture and the yogurt, beginning and ending with the flour (this step is to prevent the batter from curdling).
- Once everything has been mixed together gently fold in the blueberries and raspberries.
- Spoon the batter into the muffin cups and then sprinkle each cup with a little bit of the granulated sugar.
- Bake the muffins for 20-25 minutes (or 12-15 minutes for mini muffins), or until the muffins are golden brown and the center muffins bounce back up when touched. Enjoy!
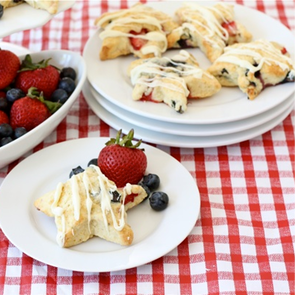
Red, White and Blue Scones from Two Peas and Their Pod
 Ingredients- 2 cups all-purpose flour
- 2 tablespoons sugar
- 1 tablespoon baking powder
- 1/4 teaspoon salt
- 5 tablespoons unsalted butter, cut into small pieces and chilled
- 1/2 cup fresh blueberries
- 1/2 cup fresh chopped strawberries
- 1 large egg
- 3/4 cup cold heavy cream, plus extra cream to brush the tops
- 1 teaspoon vanilla extract
- Turbinado sugar, for sprinkling on top of scones
- 1/2 cup white chocolate chips, melted-for drizzling
Directions- Preheat the oven to 400 degrees F. Line a baking sheet with parchment or a silicone mat.
- Whisk the flour, sugar, baking powder, and salt together in a large bowl. Drop in the butter and, using your fingers, toss to coat the pieces of butter with flour. Use your fingers or a pastry blender, cut and rub the butter into the dry ingredients. You will have some small pea size pieces of butter and that is fine. Gently stir in the blueberries and strawberries.
- In a small glass measuring cup or bowl, whisk together the egg, heavy cream, and vanilla extract. Pour mixture over the dry ingredients and stir with a spatula just until the dough comes together. Carefully knead the dough by hand, just until the dough comes together.
- Lightly dust a work surface with flour and turn out the dough. Pat the dough into a circle. Gently roll out the dough. You want the dough to be about an inch thick. Cut the dough into star shapes using a cookie cutter. Place the scones on the prepared baking sheet, about 2 inches apart. Lightly brush the scones with cream and sprinkle with turbinado sugar.
- Bake for 12-14 minutes, or until golden brown. Transfer scones to a rack and cool to cool to room temperature. Once cooled, drizzle each scone with white chocolate. Let stand until chocolate is dry.
Do you have any other fun red, white and blue breakfast ideas? Have a wonderful weekend!
xoxo
Megan
You might also like these other red, white and blue recipes...
The first day of summer is tomorrow and that means it is flip flop season! Today is actually National Flip Flop Day so its the perfect time to stash all those other shoes away, get a pedicure and rock those flops all summer long! So in celebration of this wonderful summertime holiday here is a great (and super easy) recipe on how you can make your own flip flop cookies. Ingredients- Nutter Butter Cookies
- Icing
- Sprinkles or Decorative Candy
Directions- Pull Nutter Butters out of package.
- Pipe two lines of icing on the cookies to create the straps.
- Add flip flop decorations for some extra fun and enjoy!
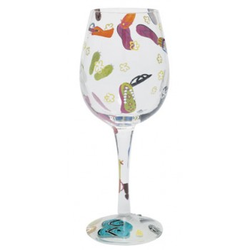 And while you are enjoying your flip flop cookies you can whip up a batch of drinks called "Flip Flop" that was created by Lolita. (I just love all their glassware designs!!) Flip Flop Recipe1 oz ginger ale fill with white wine splash of favorite fruit juice float favorite fruit slice *Enjoyed from a flip flop themed glass for extra celebration points!
Now that sounds like the perfect way to celebrate National Flip Flop Day!! How are you celebrating National Flip Flop Day? Have a wonderful weekend!
xoxo
Megan
You might also like...
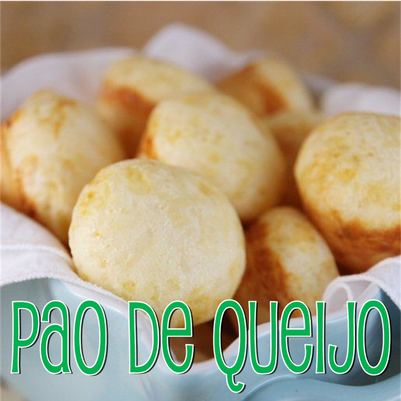
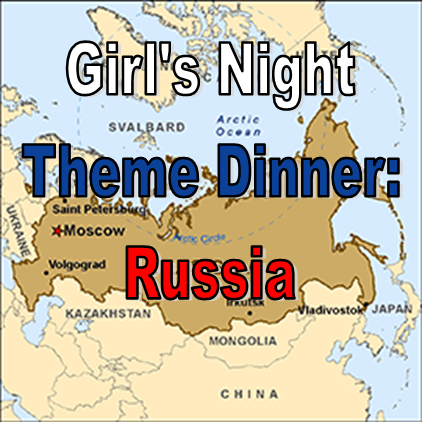
One of the very first girl's night theme dinners that I went to we made dishes from the wonderful country of Brazil. With all the world enamored with all things Brazil right now as we watch the FIFA World Cup I thought it would be fun to share with you one of the other delicious recipes that my friend Emily made for that Brazil theme dinner and is perfect for a World Cup watch party. Pao de Queijo (bread of cheese)Ingredients- 1 large egg
- 1/2 cup milk
- 1/4 cup canola oil
- 1 cup tapioca flour (sometimes labeled tapioca starch) no substitutions
- 1/2 tsp kosher salt
- 1/4 C grated cheddar cheese (preferably medium or sharp)
- 1/4 C grated Parmesan cheese
Directions- Preheat oven to 400 degrees.
- Place egg, milk, oil, tapioca flour, and salt in blender and blend until smooth. Add cheeses and pulse 2 times.
- Immediately pour batter into a mini muffin tin (if your muffin tin isn’t non-stick, spray lightly with non-stick spray first), filling each well about 3/4 full.
- Bake for 15-20 minutes until puffed and golden.
- Remove from oven and cool for a few minutes before removing rolls from pan. Serve warm as these actually don’t re-heat well so I recommend making and eating fresh.
*While this recipe makes around 18 mini pao de queijo I would strongly recommend doubling this recipe as you will want to eat an entire batch yourself. Are you making any fun Brazilian or soccer themed foods as you watch the World Cup this weekend? Don't forget USA plays Ghana on Monday! Have a wonderful weekend and Happy early Father's Day!!
xoxo
Megan
You might also like...
Being sick really throws your week for a spin when you had everything planned out, especially before a holiday weekend. Luckily, I have (almost) fully recovered and cannot wait to spend some time down at the beach celebrating a fun Memorial Day weekend. It has been way too long since I was last down at the beach house and I cannot wait to get my toes in sand and get back out in the ocean for some paddleboarding! So to get you in a festive beach - I mean Memorial Day Weekend celebration here is a great patriotic dessert thanks to the entertaining goddess Martha Stewart. Ingredients - 1/2 pound strawberries, hulled and quartered (1 1/2 cups)
- 1/4 cup sugar
- 1/2 pound blueberries (1 1/2 cups)
- 1 1/4 cups low-fat plain yogurt
Directions - In a food processor, puree strawberries with 1 tablespoon sugar then transfer to a small bowl.
- Next puree blueberries with 1 tablespoon sugar.
- For your final layer whisk together yogurt and 2 tablespoons sugar in a separate bowl.
- Pour the 3 mixtures, making sure to alternate colors, into ten 3-ounce ice-pop molds, making 3 to 5 layers in each. With a skewer or thin-bladed knife, swirl mixtures together in an up-and-down motion. Insert ice-pop sticks and freeze until solid (2 1/2 to 3 hours or up to 1 week).
You now have some delicious red, white and blue (& healthy) patriotic treats just in time for this weekend's Memorial Day celebrations. What are your plans for this Memorial Day Weekend?
xoxo
Megan
You might also like...
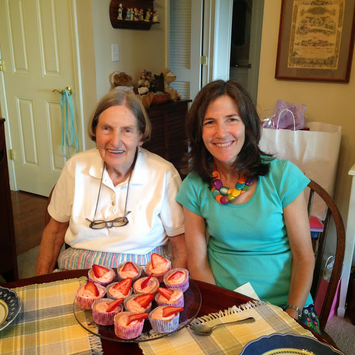
I had such a fun weekend celebrating Mother's Day with my mom and grandma this past weekend. I threw together a fabulous lunch, created a colorful bouquet of flowers, and tried out a recipe for strawberry cupcakes that I ran across on Pinterest for dessert. We all had such a great time together on Sunday and I cannot wait until the next time we are all together to celebrate. Here are some great pictures from our Mother's Day celebration as well as the delicious cupcake recipe I made.
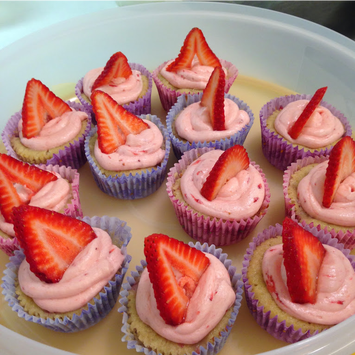
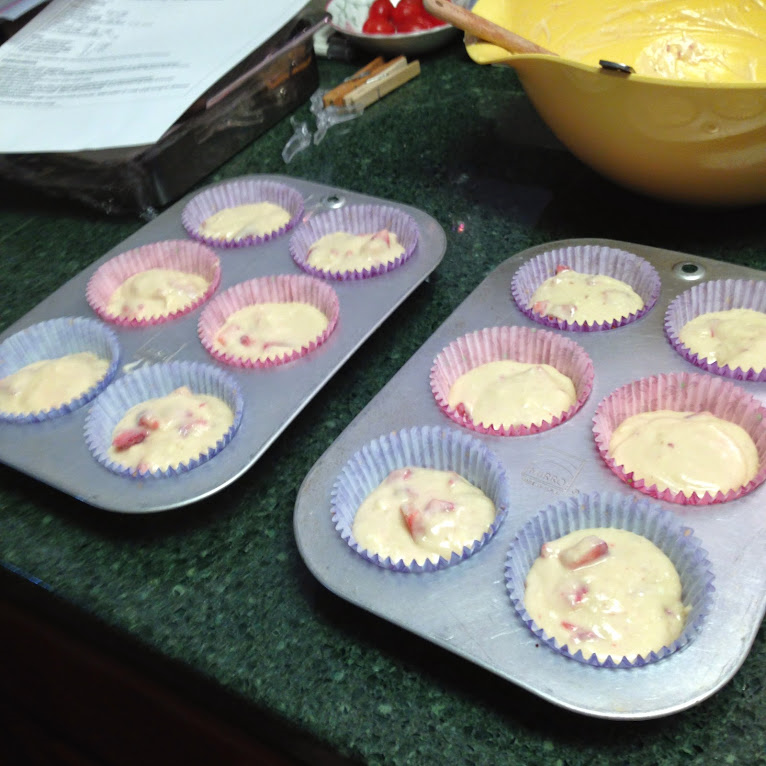
A big thanks to WholeFoods for always having beautiful bunches of flowers to choose from. I could not have put together this Mother's Day bouquet without them! A beautiful picture of my mom and grandma on Mother's Day! So happy I was able to celebrate with you two! And while my cupcakes didn't look exactly like the ones from blogger Life, Love and Sugar, they were just as delicious (I promise!). Big thanks to my dad for the final touch with the strawberry slice on top! Here is how you can make your own Fresh Strawberry Cupcakes complements of Life, Love & Sugar. The homemade strawberry frosting was beyond addictive! I may or may not have had some just by itself. Cupcake Ingredients- 1 2/3 cups flour
- 1 cup sugar
- 1/4 tsp baking soda
- 1 tsp baking powder
- 3/4 cup butter, room temperature
- 2 eggs
- 2 tsp vanilla
- 1/2 cup sour cream
- 1/4 + 1/8 cup milk
- 3/4 cup chopped strawberries
| Icing Ingredients- 1/2 cup salted butter
- 1/2 cup shortening
- 4 cups powdered sugar
- 6 tbsp strawberry puree
- 1 tbsp water or milk (only if needed)
| Instructions- Preheat oven to 350 degrees.
- Whisk together flour, sugar, baking soda and baking power in a large mixing bowl.
- Add butter, eggs, vanilla, sour cream and milk and beat on medium speed until smooth.
- Fold in the strawberries.
- Fill cupcakes liners a touch more than half way.
- Bake for 18-20 minutes.
- Allow to cool for 2-3 minutes, then remove to cooling rack to cool completely.
- While cupcakes cool, make the icing. Beat together butter and shortening until smooth.
- Slowly add 3 cups of powdered sugar. Mix until combined.
- Mix in the strawberry puree.
- Add the rest of the powdered sugar and mix until smooth. If you need to add water or milk until icing is desired consistency.
- Once cupcakes are cool, pipe on the icing.
**This recipe makes about 24 cupcakes. I halved the recipe and only made 12 for Mother's Day. I had so much fun celebrating Mother's Day this past weekend! What did you do with your mom?xoxo Megan You might also like...
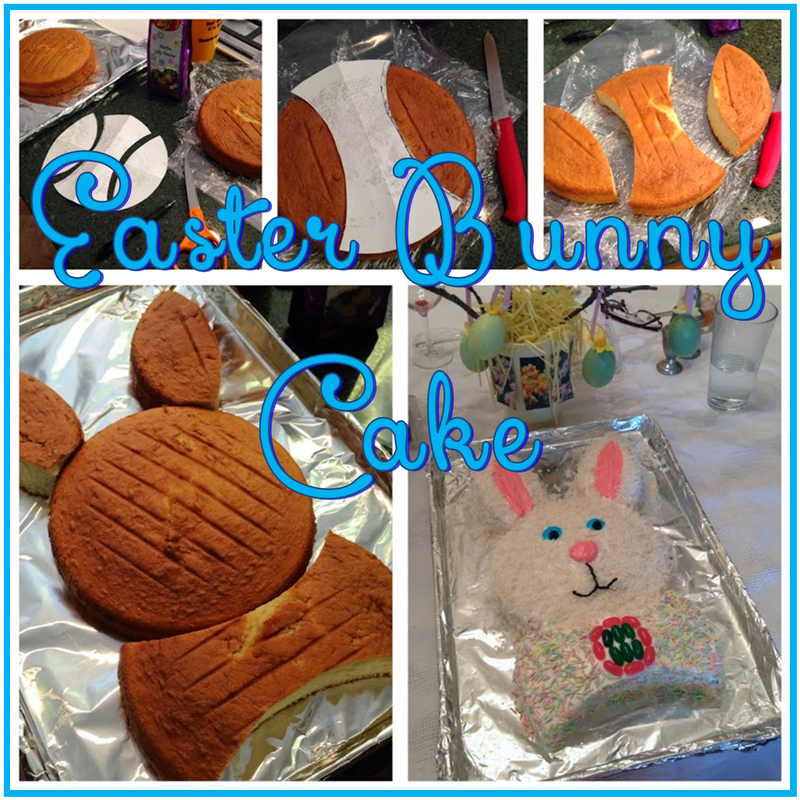
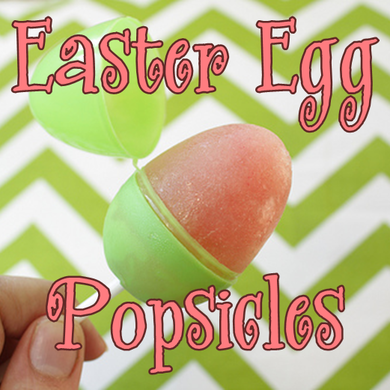
I can't believe that Easter is only a few days away! I still need to get my Easter cards together - eek!! But with card shopping aside there is still plenty of time to whip up some adorable Easter treats, like these Easter Egg Popsicles from blogger Kalio Chic. You can make these kid friendly or pour in your favorite summer time beverage like you would for homemade freeze pops. Just make sure you label the eggs accordingly if you are making both! Here is what you will need to make these Easter treats: Ingredients- fruit juice, lemonade, or drink mix
- plastic Easter eggs
- plastic candy sticks
- empty egg carton
- a large nail
- a thumb tack
- a piping tip
Instructions- First place all your plastic eggs upside down in your empty egg carton.
- Take your thumb tack and poke three holes in the bottom. Two of these holes are for letting the air escape when filling the egg, the third one should be in the center of the bottom. Make this center hole bigger using the large nail. You will need it to be as big as the candy stick.
- Take your piping tip and slowly pour your drink choice into the egg until it is almost full and then place your candy stick into the egg.
- Once all your eggs are filled place the carton into the freezer until they are firm.
- When you are ready to serve, pull the eggs out of the freezer and warm up the top of the egg with your hands so that you can pop off the top to enjoy.
Are you making any egg-tra special Easter treats to enjoy on Sunday?
xoxo
Megan
You might also like these Easter ideas...
|


 RSS Feed